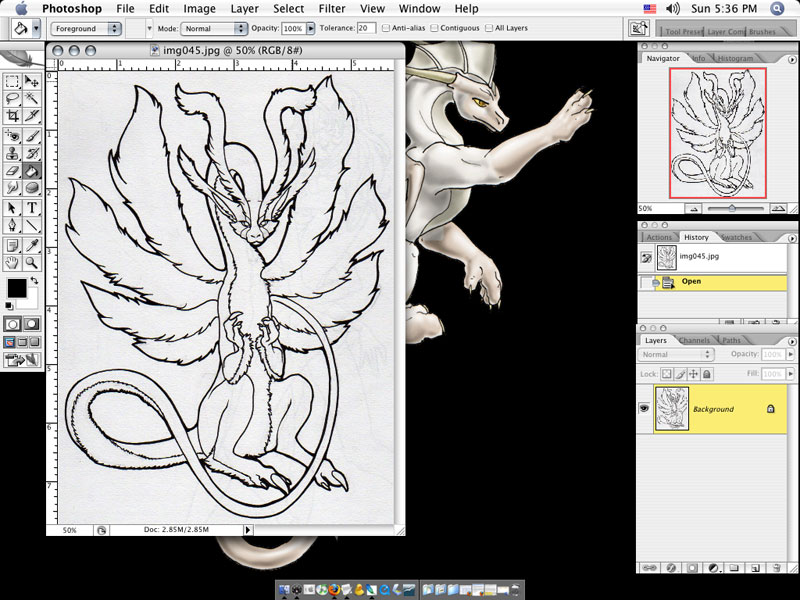
Here's the image fresh from the scanner. Rather large, fairly grainy.
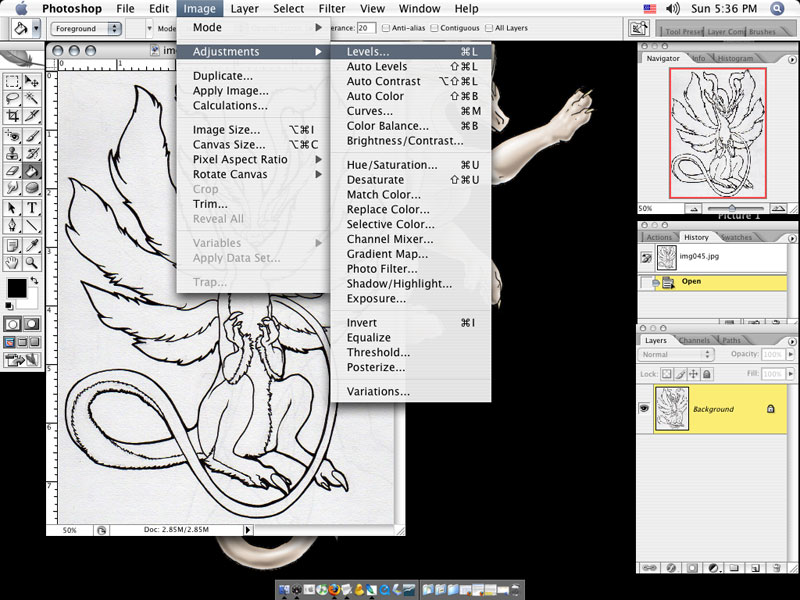
Firstly, I want to make the image more black/white then it is, so I go Image>Adjustments>Levels. That will bring up a little window like the one below.

Here, I've moved the white arrow towards the center of the graph a little, from the very edge towards the center of that big spike, there. That makes the background whiter.
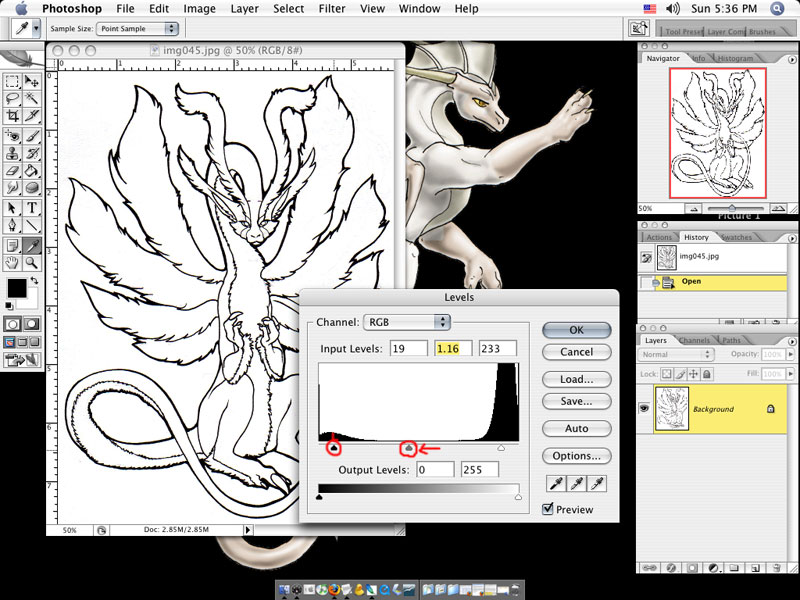
Next, I move the black arrow into the center of the graph... about towards the middle of the left-hand hump. This makes the outline more black. I pushed the grey-arrow a little to the left in the graph, until the image looked how I wanted it to.
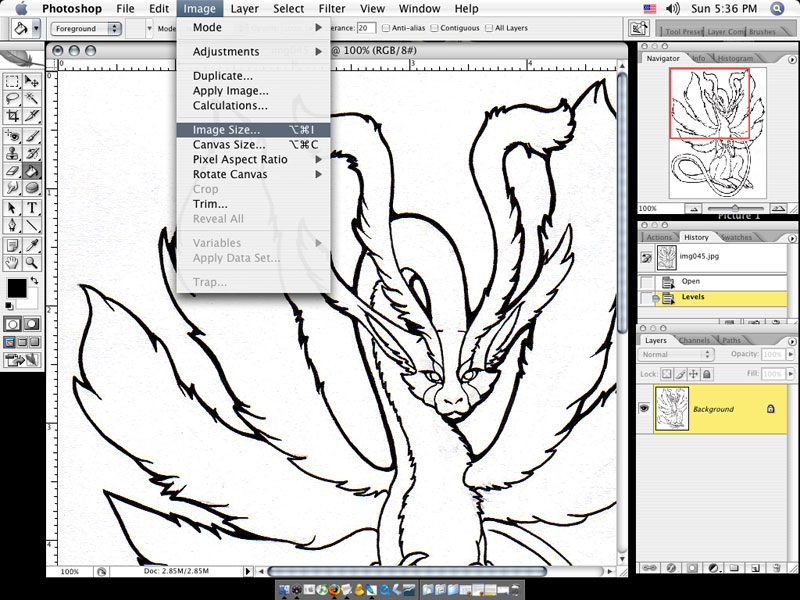
Above is the image as its original size... which is too large for me to want to spend time colouring and shading everything. For a good-quality image, I suppose that I'd want to work at something that's even larger, but for cyberpets, I like to size an image down before I start colouring it. Here I'm about to change the image-size to about 600 pixels tall.
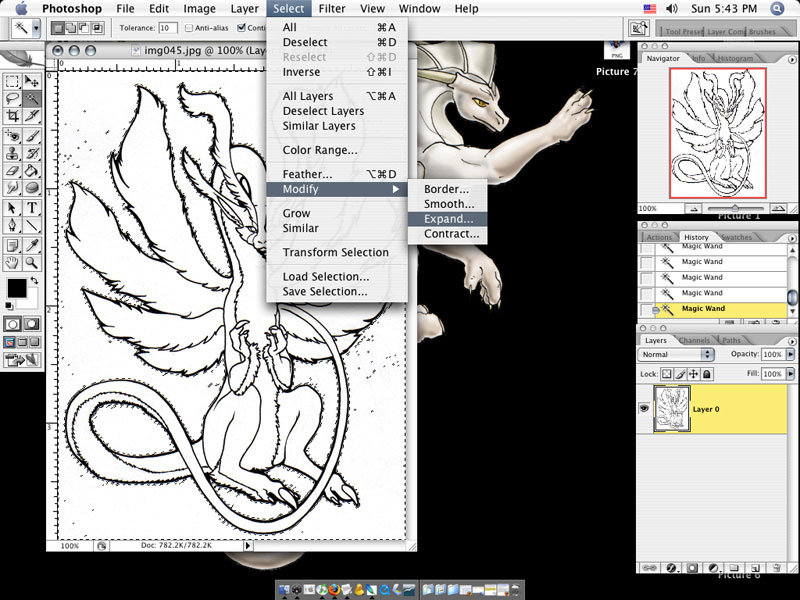
And voila. I've kind of skipped a little here. What I've done is taken the magic-wand tool and selected all of the areas that I want to make transparent (to select more then one section, hold down the shift-key while you're clicking the section.) Now, I'm going to delete all of those little blips in the image that changing the levels didn't get rid of. Go through the Select>Modify>Expand menu, and when the new window pops up, ask for it to expand by 2 pixels.

This is the result--very thin outer-outline! Time to make some thicker black around that outline so it's uniform with the lines /inside/ the image.
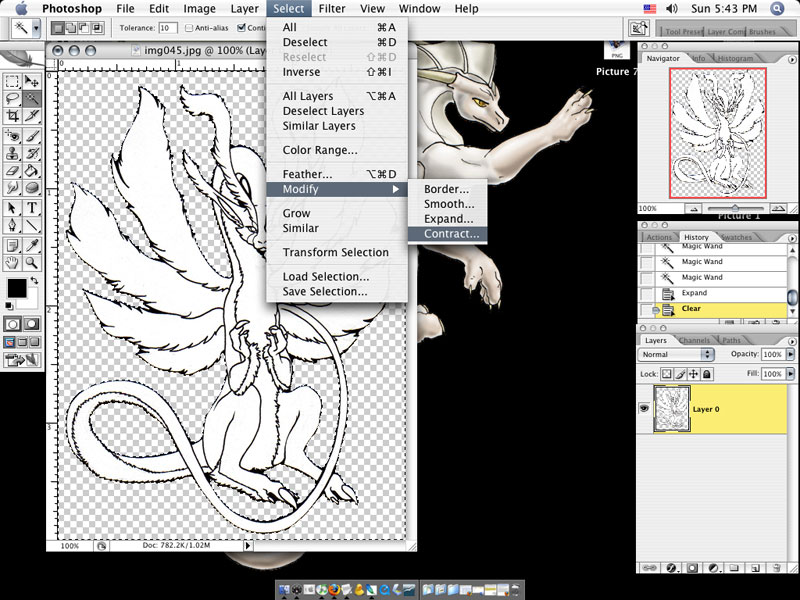
To do that, I use just about the same method as for the last image. Select>Modify>Contract, with 2 pixels typed into the field when the new window pops up.
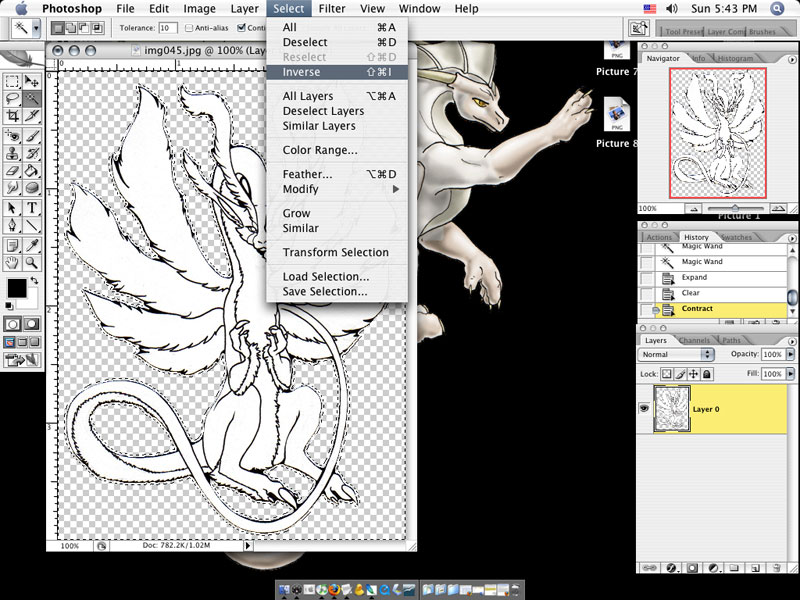
The image ends up looking something like this, with a bit of space between the dotted-line and the image itself. To fill that in with black, you go Select>Inverse, and then click anywhere outside of the image to get a thick, black line.
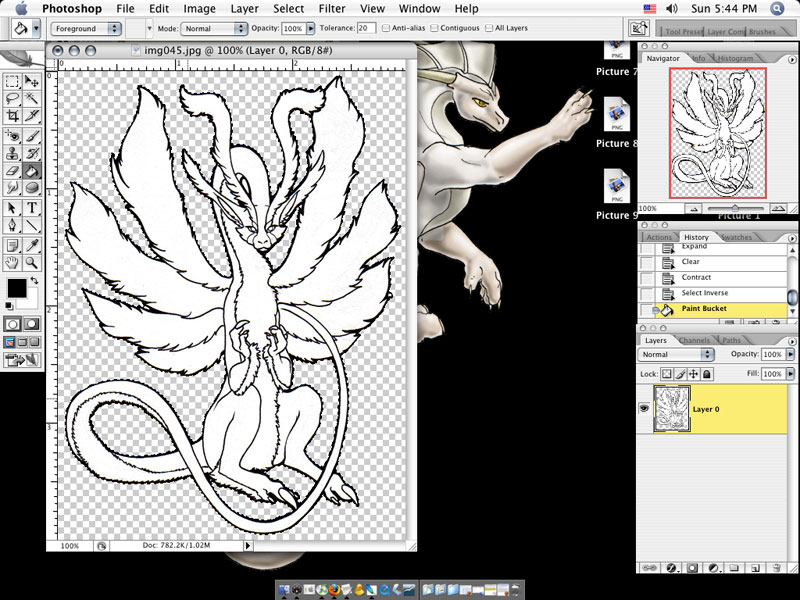
Like so. Now that the image is the right white/black, the right size, and with proper outlines, all I have left to do is to make sure that the canvas ends at the outer edges of the image, instead of leaving space. All you have to do for that is to copy the image into a new file...
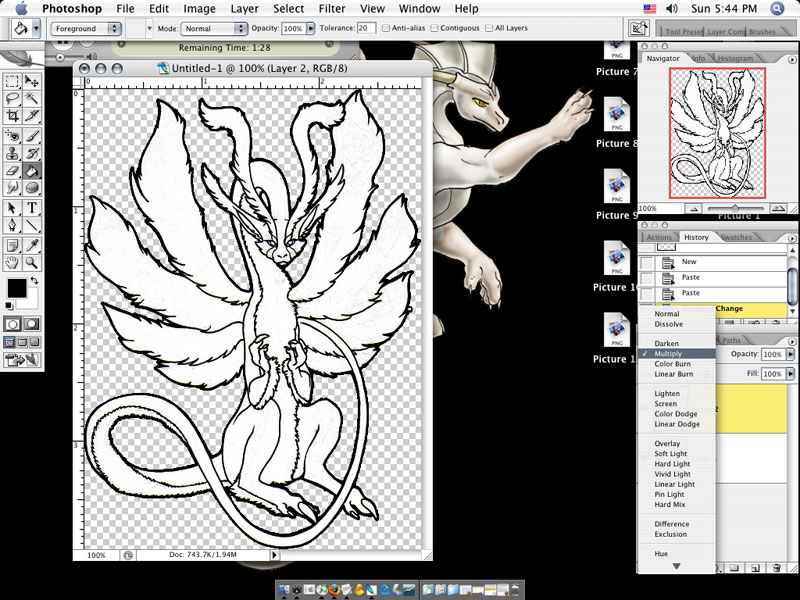
...like so. (Notice that the title says 'Untiled-1' instead of 'img045.jpg') I actually paste the image in, and paste the same image over top of it. In the above diagram I'm turning the top layer to 'multiply', which is making all of the lines appear a little darker, but that's okay because I'll be turning the bottom layer white.
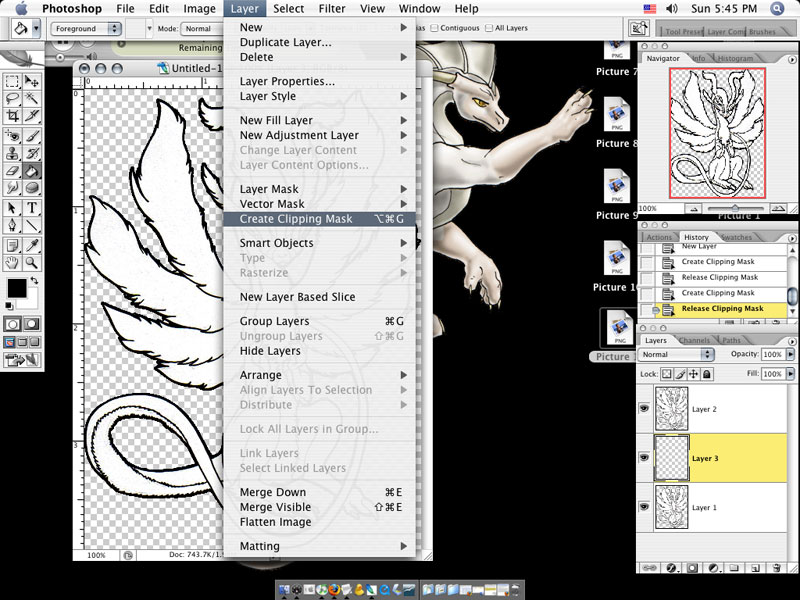
Which is what I'm about to do, here. First, I create a third layer (the one in the middle), and group it with the layer below it. In different versions of Photoshop, this can be done differently. I believe that in CS and below you simply have to 'group with previous', or something similar. In CS2, you need to 'create clipping mask.'
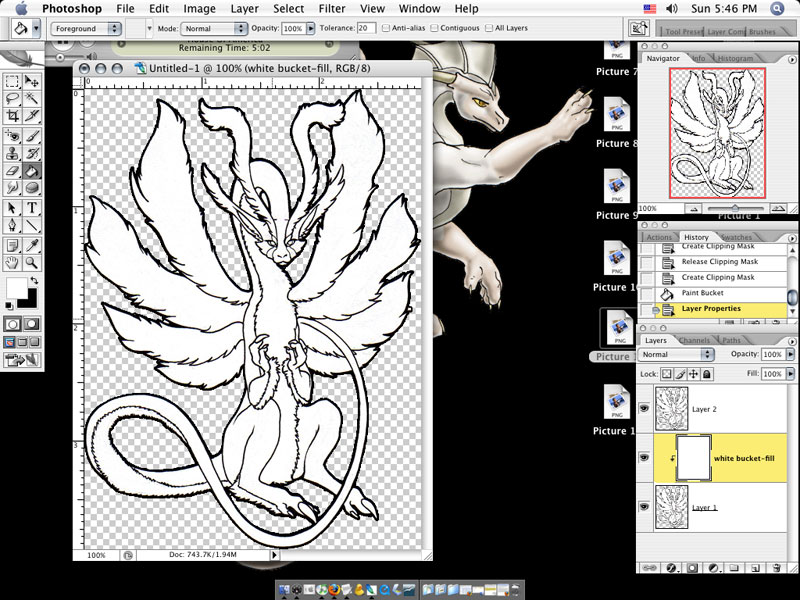
When the layers are grouped properly, they'll look like these ones do in the diagram. In this diagram I've simply flood-filled the 'white bucket-fill' with the fill-bucket, with white (har!). Almost done!
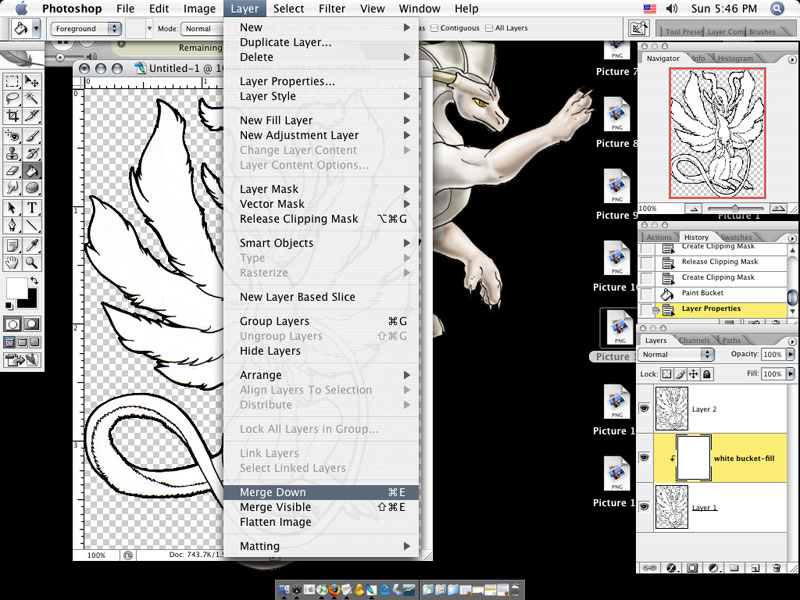
Now I'm merging the bottom line-art layer with the white layer. That'll combine the two, with the white masking the black-outlines.
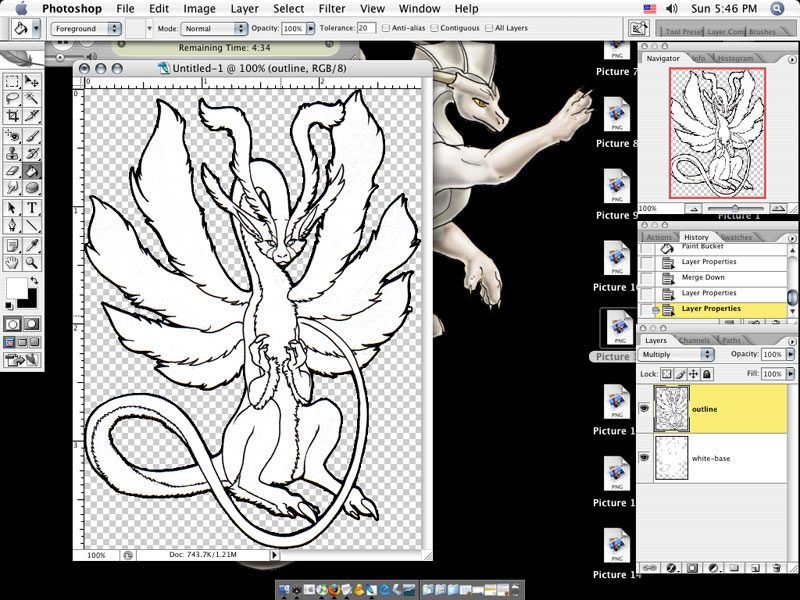
You should end up with a layer-palette that looks something like the one on the lower right of this image. (I've renamed them for eeease.)
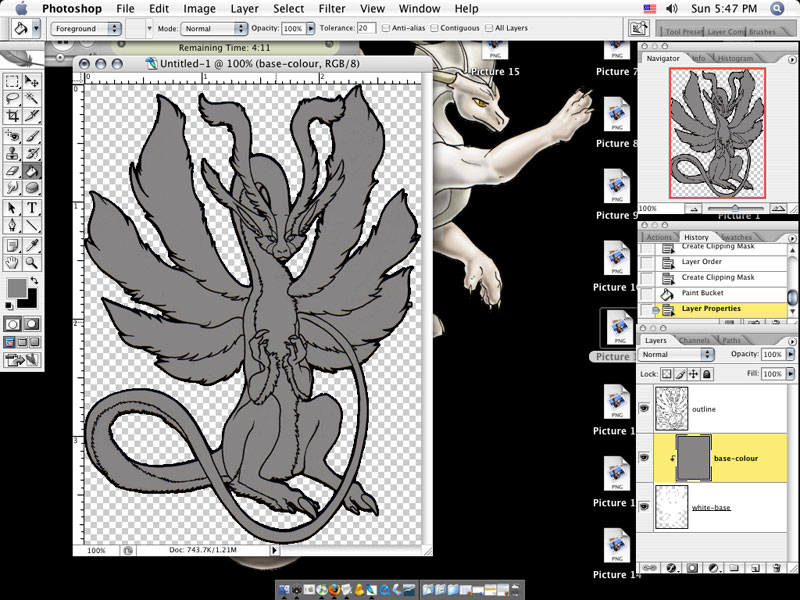
Create a new layer, group it with the white-base, and fill it with whatever colour you'll use for shading, or for the base-coat-colour of your dragon/creature. After this, it's simply a matter of blocking out what sections you want coloured differently, shading, and adding final touches. :3